


- Your cart is empty Browse Shop
The Ultimate End of Tenancy Cleaning Checklist for UK Tenants (2026) | Room-by-Room Guide for a Full Deposit Return

The Ultimate End of Tenancy Cleaning Checklist UK Tenants (2026)
Getting out of a rental property can feel. Kind of stressful, you know. Like you’ve got boxes to pack and paperwork to juggle. There are utility accounts to shut down. A moving date to hit. At the same time. Your landlord or letting agent also expects the place to come back in a spotless condition. Not just good enough. You know.
Many tenants underestimate how detailed a final inspection can be. Inventory clerks often check inside cupboards. Behind appliances. Around skirting boards. On top of doors, inside ovens. They also look at bathrooms. Windows. Light switches. Floors. Every small detail can affect the final inspection. Areas that seem unimportant in everyday life can become sources of cleaning disputes when your tenancy ends.
A detailed end-of-tenancy cleaning checklist helps you kinda stay organized. And it lowers the chance of forgetting important stuff. Rather than rushing through the property on moving day. You can go room by room more steadily. methodically. And then you know each area matches the expected rental standards.
This guide gives you a complete room-by-room end-of-tenancy cleaning checklist for UK tenants. You will learn what landlords inspect. Which areas tenants often forget. And how to prepare your home for a successful final inspection.
Why End of Tenancy Cleaning Matters
Cleaning is one of the biggest causes of tenancy deposit disputes across the UK. Many tenants leave a property believing it is clean enough. Only to discover that the landlord or letting agent disagrees.
The goal is not to make the property look brand new. The goal is to return it in a condition that matches the cleanliness recorded in the original property inventory. Allowing for fair wear and tear.
A thorough rental property cleaning checklist helps you:
- Increase the likelihood of getting your full deposit back.
- The landlord’s going to come inspect.
- Meet tenancy agreement cleaning requirements.
- Avoid professional cleaning charges after moving out.
- Leave the property ready for new tenants.
What Landlords and Letting Agents Check During an Inspection
Landlords and letting agents check that the property is clean and well-maintained, and in good condition. They inspect every room. Including kitchens. bathrooms. floors. windows. and appliances. They also look inside cupboards and other easy-to-miss areas. A thorough clean helps improve your chances of getting your full deposit back.
The parts that usually get the most attention include
- Kitchen appliances.
- Ovens and hobs.
- Bathrooms and toilets.
- Shower screens.
- Kitchen cupboards.
- Floors and carpets.
- Interior windows.
- Skirting boards.
- Doors and door frames,
- Light switches.
- Taps and sinks.
- Limescale build-up.
- Dust on high surfaces.
- Mould and mildew.
- Odors throughout the property.
Before you start cleaning. Compare the place with your inventory report. If you still have it. That way you get a feel for the yardstick the landlord will use during the final inspection.
Cleaning Supplies You Should Prepare
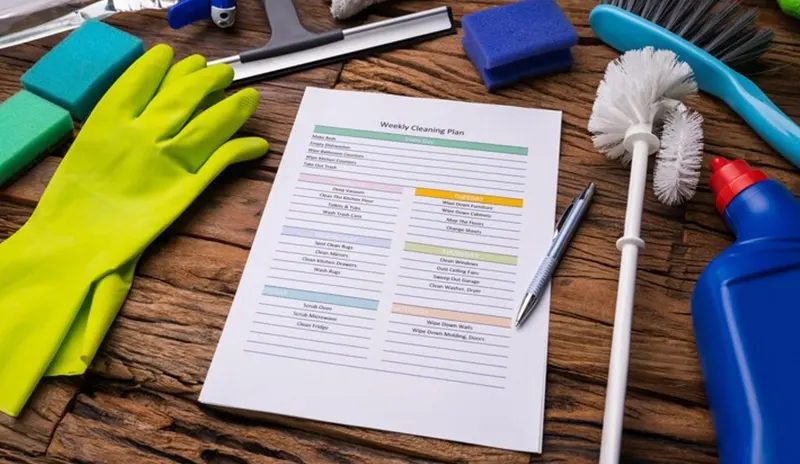
The right cleaning supplies on hand before you start will save you time and make the job much easier. You can get rid of dust with a full cleaning kit. stains. grease. and filth from each room. It also allows you to clean more efficiently without stopping to buy missing items. Keep all your supplies together before you begin your move-out cleaning.
- Microfibre cloths.
- A vacuum cleaner.
- Mop and bucket.
- Glass cleaner.
- Degreaser.
- Limescale remover.
- Bathroom cleaner.
- Multi-surface spray.
- Floor cleaner.
- Sponges.
- Scrubbing brushes.
- Rubber gloves.
- Bin bags.
- Paper towels.
Also, using the appropriate cleaning products for each surface helps prevent damage, and the results are usually much more satisfying.
Room by Room End of Tenancy Cleaning Checklist
The entrance and hallway are the first areas landlords and letting agents see during an inspection. These spaces should be clean and dust-free. And free from marks or clutter. Wipe all surfaces. Vacuum or sweep the floor. Dust off webs on walls and ceilings. A neat entrance creates a good first impression. implying the property has been well cared for.
Your hallway cleaning checklist should include:
- Remove cobwebs from ceilings and corners.
- Dust light fittings.
- Wipe doors and door frames.
- Clean handles and locks.
- Remove marks from walls where possible.
- Dust skirting boards.
- Vacuum corners and edges.
- Mop hard flooring.
- Clean switches and sockets.
- Wipe radiators.
Walk through the entrance when finished. The area should feel bright and tidy. And free from dust.
Living Room Cleaning Checklist
The living room is one of the most often used areas. So dust and dirt can build up pretty quickly. honestly. You should clean all the surfaces and furniture. And skirting boards, and take a look at the light fittings. too. Next, vacuum the carpets. Or mop the hard floors. Then vacuum the carpets. Or mop the hard floors again. Wipe windows. switches. and door handles. A clean and tidy living room helps create a good impression during the final inspection.
Do these tasks :
- Dust the shelves and the furniture.
- Wipe tables and the TV unit.
- Clean mirrors.
- Dust picture frames.
- Remove fingerprints from the doors.
- Clean inside windows.
- Vacuum Chairs and Sofas.
- Vacuum cushions.
- Wipe the skirting boards.
- Vacuum carpets well.
- Mop hard flooring.
- Wipe window sills.
Also, look at corners and the spots behind furniture. Where dust tends to hide; it’s kinda stubborn.
Bedroom Cleaning Checklist
The bedrooms should feel sort of fresh and ready for the next tenant, like in a really done way. Not just kinda. Everything should look clean. But also calm.
You’ll want to do things like:
- Dust wardrobes, inside and outside.
- Clean the drawers and the shelving, not only the top.
- Wipe the bedside tables.
- Take off smudges or marks from the walls.
- Clean mirrors until they look clear.
- Dust skirting boards around the edges.
- Clean the window frames.
- Vacuum the carpets really well.
- Mop the hard floors properly.
- Remove dust from the radiators.
- Clean door handles and light switches.
Also, before you finish. Check under the beds and behind furniture. Because that’s where the forgotten bits like to hide.
Kitchen Deep Cleaning Checklist
The kitchen is one of the most important areas during an end-of-tenancy inspection. Every appliance should be cleaned inside and out to remove grease. Food residue. and stains. This includes the oven. hob. extractor fan, fridge freezer. microwave. dishwasher. and a washing machine. Leaving your kitchen clean. hygienic. and ready for the next tenant.
- Appliances kinda stuff
- Clean out the inside of the oven.
- Get the oven racks and trays cleaned.
- Clean the oven door glass.
- Clean the hob. Including its burners.
- Clean the extractor fan area.
- Wash the extractor filters too.
- Defrost the fridge freezer- no delays.
- Clean the fridge shelves and drawers, as usual.
- Clean the microwave inside and outside. carefully.
- Wipe the dishwasher seals gently.
- Clean the washing machine drawer slot.
- Remove detergent residue completely.
Cupboards and Surfaces
- Empty all cupboards.
- Wipe shelves and doors.
- Clean drawer interiors.
- Degrease splashbacks.
- Clean worktops.
- Descale the sink and taps.
- Polish stainless steel surfaces.
Floors
- Vacuum under appliances.
- Remove food debris.
- Mop flooring thoroughly.
- Clean skirting boards.
The kitchen should be free of grease and food residue. stains. and unpleasant smells.
Bathroom Deep Cleaning Checklist
Bathrooms often require the most detailed cleaning because limescale. Soap scum and moisture build up quickly. Every surface should be cleaned and sanitized to remove stains and prevent mould. Leave the bathroom fresh. Hygiene and ready for the final inspection.
Shower and Bath
- Remove limescale.
- Clean shower screens.
- Descale shower heads.
- Scrub tiles.
- Clean grout lines.
- Remove soap residue.
- Treat mould where necessary.
Toilet
- Descale under the rim.
- Clean toilet seat.
- Wipe flush button.
- Clean the exterior.
- Clean around the base.
Sink and Mirror
- Descale taps.
- Polish chrome fixtures.
- Clean mirrors.
- Clean plugholes.
- Wipe surrounding surfaces.
Bathroom Floor Stuff
- Vacuum loose debris. A bit. Then again.
- Mop the flooring properly.
- Do corners and edges like get in there. Nice and thorough.
This bathroom should feel fresh. And hygienic too. And sort of free of mould. Or that stubborn limescale buildup.
Windows and Interior Glass
When you do the end-of-tenancy cleaning, the interior windows are often kind of ignored. And that’s too bad. Still. They can make a real difference at the final inspection. People actually look. You know. Clean the interior glass. Wipe the window frames. Handles. Curtain rails. And window sills. Dust the blinds. Remove fingerprints. And check the glass from different angles to ensure it is streak-free.
Your checklist should include:
- Clean interior glass.
- Wipe window frames.
- Clean window handles.
- Dust blinds.
- Wipe curtain rails.
- Clean window sills.
- Remove fingerprints.
Check windows from different angles to spot streaks.
Doors, Frames, and High-Touch Points
During an end-of-tenancy clean, small details are often kind of overlooked. However. they can end up making a big impact on the final inspection result. In the end. Clean door handles and door frames. Light switches and plug sockets. banisters. Stair rails. Cupboard handles and wardrobe handles to remove dust. Fingerprints and everyday marks.
Clean:
- Door handles.
- Door frames.
- Light switches.
- Plug sockets.
- Banisters.
- Stair rails.
- Cupboard handles.
- Wardrobe handles.
Small details often influence how clean a property appears during an inspection.
Floors and Carpets
Flooring should be one of the final tasks completed.
For carpets:
- Vacuum thoroughly.
- Remove visible stains.
- Clean edges and corners.
- Vacuum under furniture.
For hard flooring:
- Sweep thoroughly.
- Mop using the correct cleaner.
- Pay attention to corners.
- Clean along the skirting boards.
If carpets contain heavy staining, professional carpet cleaning may be worthwhile before your final inspection.
Common Cleaning Mistakes That Lead to Deposit Deductions
Many cleaning disputes happen because tenants miss small but important details. Common mistakes include forgetting things inside cupboards. Leaving food in appliances. Skipping the oven. Missing limescale. And ignoring skirting boards.Leaving a bit of pet hair behind. Forgetting light switches. Not cleaning where furniture meets the floor. Leaving rubbish outdoors. And overlooking those window frames. Using a proper tenant cleaning checklist before you hand over the keys really helps you dodge these hiccups. And it improves your odds of getting the full deposit back, no joke.
Common mistakes include:
- Forgetting inside cupboards.
- Leaving food in appliances.
- Not cleaning the oven.
- Missing limescale build-up.
- Ignoring skirting boards.
- Leaving pet hair behind.
- Forgetting light switches.
- Not cleaning behind furniture.
- Leaving rubbish in outdoor areas.
- Missing window frames.
A detailed tenant-cleaning checklist before handing over the keys helps prevent these issues.
DIY Cleaning vs Professional End of Tenancy Cleaning
Many tenants complete their own cleaning. Others might choose to seek professional help due to time constraints or simply because their property is rather large.
Professional cleaning tends to be really helpful when:
- The property is large.
- You are moving on the same day.
- Heavy limescale is present.
- The oven requires specialist cleaning.
- Carpets need deep cleaning.
- Your tenancy agreement recommends professional cleaning.
If you are moving from South West London. Our End of Tenancy Cleaning Wandsworth service follows a detailed inventory-based checklist designed to help tenants prepare for landlord inspections and property handovers.
Final Inspection Checklist
Before handing over the keys. Complete these final checks:
- Remove all personal belongings.
- Empty all bins.
- Check every cupboard.
- Check appliances.
- Hoover and mop floors
- Ventilate by opening windows briefly.
- Replace failed light bulbs.
- Take photographs of every room.
- Gather keys and access fobs.
- Check the inventory report.
A final walk-through often reveals small problems that are easy to fix before inspection.